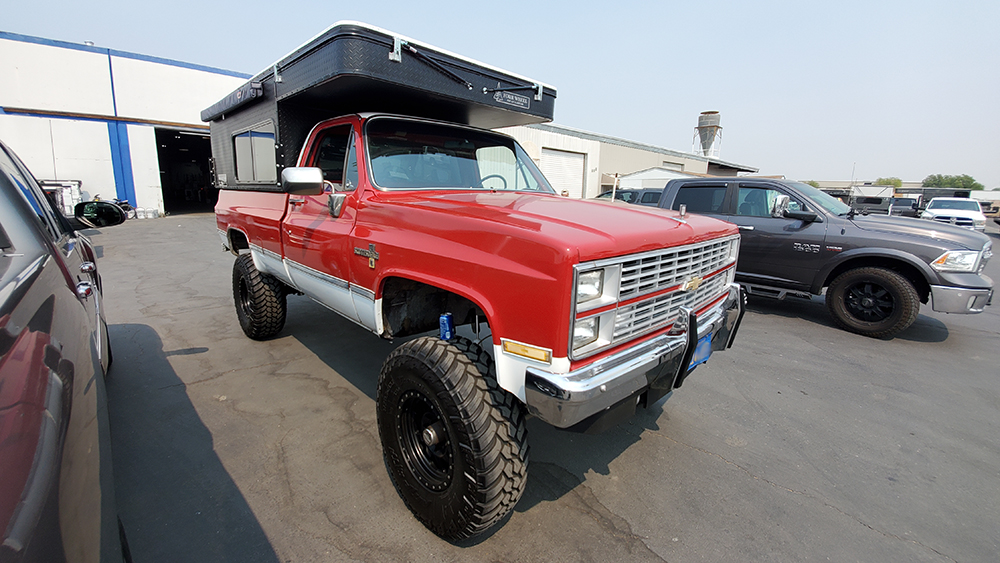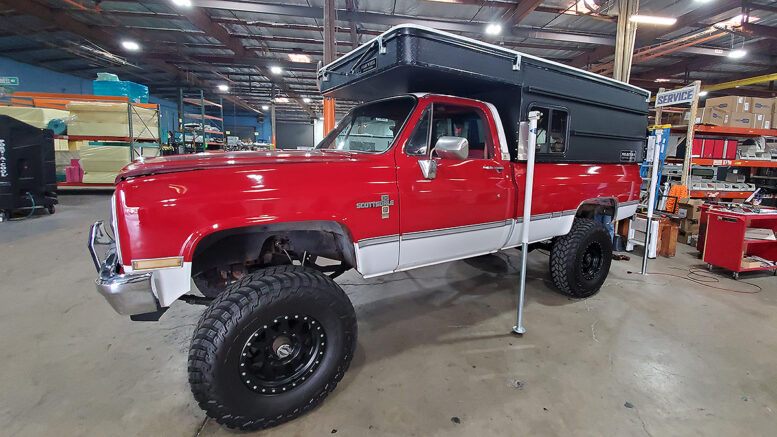
If you’ve followed Savage Camper, it’s no secret I’m a fan of Four Wheel Campers. Over the last few years, I’ve attended some of their events for blogging/vlogging. I’ve gotten to know some FWC owners, and have worked collaboratively with FWC in other ways. The employees at FWC are a fantastic group of skilled, nice people that are really down to earth. The #BigRedK10 build, using a 1983 Chevy K10 6.2 diesel long bed as the platform, received FWC sponsorship as a unique idea to promote their Project M camper that heralds back to nostalgic roots via the Savage Camper brand.
I’m also a fan because Four Wheel Campers has been building them for 50 years! Not only do they have a tremendous amount of experience behind their campers, they were building pop-ups for 1973-1987 Chevy squarebody trucks when they reigned supreme, new on dealership lots. It was at FWC headquarters the first time I’d seen a photo of one of their vintage camper models specifically built for K5 Blazers. It immediately heralded me back to good childhood memories.
Why the Project M Topper Camper vs. Slide-In Models
Over the few years of #BigRedK10 coming to fruition, the assumption was a slide-in, pop-up camper would be the ultimate way to go. Four Wheel Campers actually suggested their Project M model which is a camper topper (shell) vs. slide in. This would be a unique, first of its kind mashup of vintage truck and modern cabover camper topper. Immediately I realized there are enormous advantages with a camper topper setup that seemed to suit the 83’ Chevy K10 long bed perfectly:
Lightweight Advantage
With the 6 inch lift on the K10 and ¾ ton Dana axles, the leaf suspension had also been beefed up. However, being an 8 foot long bed, you’re looking at roughly 1,400 lbs dry weight with a slide-in pop-up, sitting high up on 37” tires makes me a bit nervous. This weight would probably require beefing up the leaf springs even more, or adding leveling air bags to eliminate rear squat and stabilize the load, especially when all loaded up.
The cool thing about the Project M is that it’s so light in comparison. Even with an 8 foot bed and all the options added, the camper would come in at only 595 lbs. That’s even with a power station which weighs probably 70 or 80 lbs due to an internal AGM battery. Without the options, the Project M for my K10 8 foot bed would come in at only 495 lbs.
Low Profile Camper Cabover
The general advantages everyone else enjoys with a Four Wheel Camper pop-up vs the traditional cabover, apply just as much here. The lower profile cabover portion of the camper is essential for better gas mileage and less impact from wind gusts (safer). With this old truck sitting so high, the ability to collapse the roof lowers the center of gravity of the entire truck/camper setup making it safer.
In terms of overhead clearance, having a pop-up roof that collapses actually enables the lifted K10 truck to be towed on a flatbed if I happen to break down, whereas it would hit an overpass with a full cabover camper. I can even still fit in some drive-thru’s, but that’s pretty limited.
Retain Space and Truck Bed Usage
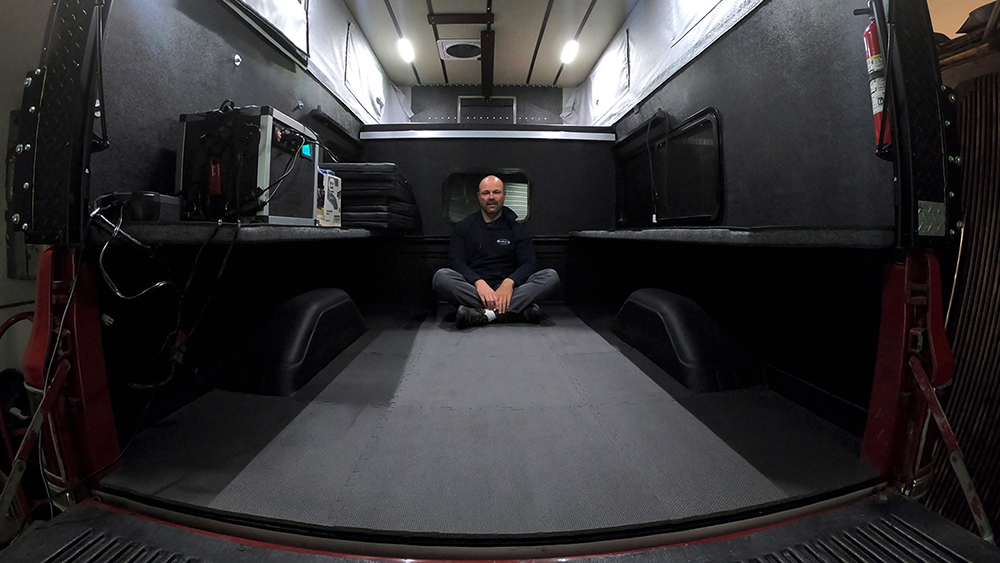
Once you commit to a slide-in camper, your truck bed is also committed to that slide-in camper unless you take it off. With the project M Camper topper, I retain full usage of my truck bed and I can even haul full sheets of 4 foot by 8 foot plywood in the bed of the truck without taking the camper off, being that I have an 8 foot bed. This is because the camper sits on the rails of your truck bed (think a camper shell). The rear opens up as a double-locked secure hatch and you retain your tailgate just like a camper shell as well. Many people love this because they can store their gear, like bicycles inside securely.
Create Your Own Custom Interior
While they offer full, plush build-outs for those that want them, DIY is kind of one of the hidden hallmarks of Four Wheel Campers that attracts people who like to individualize their camper setup to their own unique living space.
If you’ve followed Savage Camper, you’d probably know I am quite a DIY’er and have built things like the Savage Camper Kitchen, so the Project M topper is a perfect platform where I can use my creative/craftsmanship skills to build a custom/functional interior to suit my own taste.
Project M is More Affordable
Even for a stripped down 8 foot slide-in camper, the prices probably start around $20K and up. For a Project M, at the time of this article, prices for the 8 foot version started under $10K. Half the price.
Same Quality
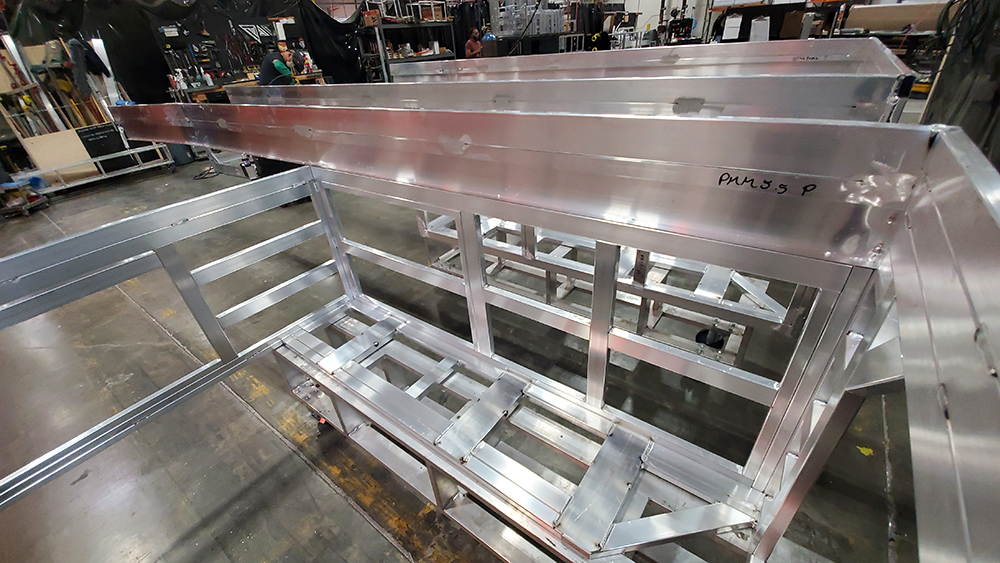
Despite the drastically lower cost, Project M campers are built with the same high-quality engineering, construction and materials you see in all other Four Wheel Camper models. The campers are designed for offroad use, with a welded aluminum frame.
8 Month Restoration Marathon to Install Day
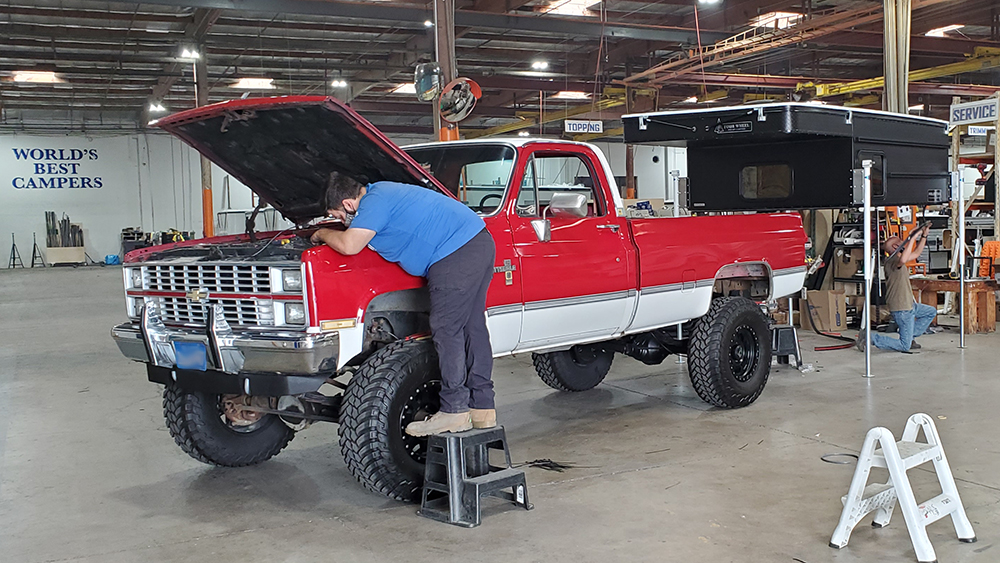
After it was a green light on the Project M, I went heads down into full-time restoration work on the Chevy K10. I had already tackled restoring the truck bed and rear axle, confidence was building and I thought it would be just steady work to the camper install date finish line. Couldn’t have been more wrong!
It wasn’t long until I discovered the cab of the truck, both the front and rear window frames were almost completely destroyed by rust, with big holes where water just ran inside the cab. Floor pans were rotted out too under the rubber floor matting where the water had run down inside and sat. It was still even wet for months after being parked in the shop.
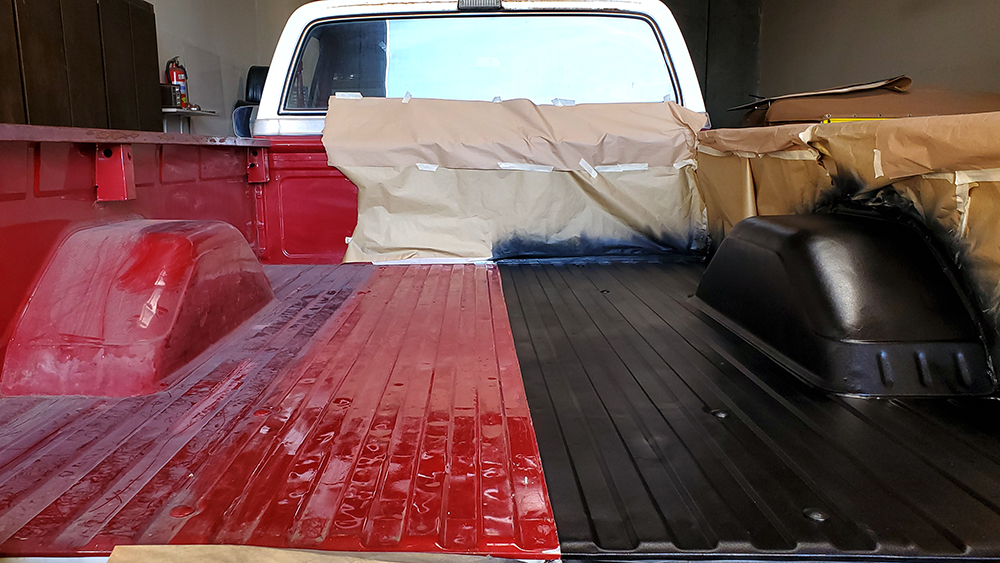
I couldn’t afford to buy another cab and couldn’t find one to cut sheet metal from, so I had to learn how to mig weld sheet metal and custom fabricate new sheet metal patch panels to rebuild the window frames, with just the basic tools that I already had. Both windows through full restoration, body work and paint took me 7 months because I had to learn every step along the way. This ate up almost all the time I had before the camper install date.
However, with just a month to spare, I was able to restore the front plastic grille and headlight bezels, put the truck back together and squeeze in maintenance prep as much as time would allow for the 200 mile round trip journey to the Four Wheel Camper factory for the install, then back home.
Project M Camper Installation Day at the Factory
On the road by 6am, I decided it best to not stop and head straight for the factory. Talk about a rough ride! Without any weight on the heavy duty leaf springs in the lifted K10, it’s an incredibly rough and jarring ride that beats you up along with the truck. Needless to say, I made it in one piece and we started Four Wheel Camper’s streamlined process for installation.
The crew immediately pulled my truck into the factory and backed it up to the camper for the initial fitting. I had sent a series of truck bed measurements they had requested, to see how well one of their predetermined production sizes would fit on this old truck bed. I had all sorts of concerns along the way about proper fitment – how much gap between the bottom of the cabover and truck roof, would it sit flush on the bed rails, etc. Well, the camper ended up fitting perfect! The install crew measured and marked everything, then pulled the truck back out to do final install work.
Mounting the camper to the bed, I had 2 options. One was a clamp system and the other, bolted right through the bed rails. I opted for the 2nd option because the camper is much more secure and is the option most people go with. I don’t want this camper shifting when I’m on rough terrain. Once they pulled the truck back out, a single piece, double bulb seal was added to the underside rail of the Project M where it sits on the bed rail, to seal out dust and water.
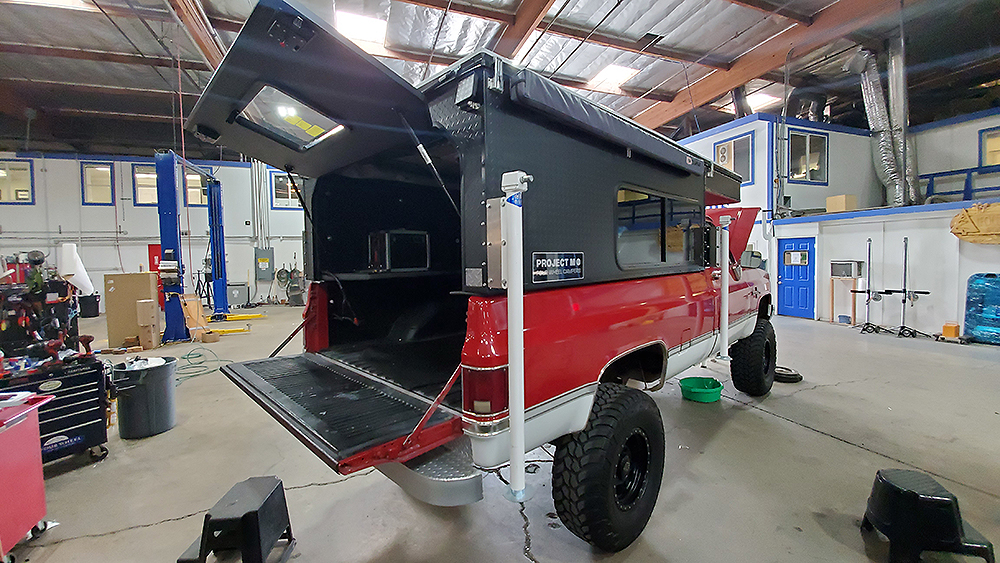
Power in the camper was wired to recharge off the truck when running, and other final work was completed before the camper was finally bolted to its new home on the K10.
As luck had it, the K10 actually died on the showroom floor and I had to have it towed home from the factory (this is how I know it clears overpasses on a flatbed tow truck). A minor fuel system issue was resolved the next day back home.
Back on the road, I immediately noticed that the truck rode and cornered much better with the camper on, but beyond that I don’t even feel it driving as if it were meant to be part of the truck.
Next article, I’ll go into more detail about the options I chose for #BigRedK10’s Project M and why they were chosen.